Saturday, February 22, 2014

How do I create a Broadband connection in My Windows?


The walk through will guide you through the Network & Sharing options in Windows 7.

To get started, double-click 
Network from the Desktop.


The Network window opens.

Click the 
Network and Sharing Center option from the top navigation bar.


In the graphical map, click the icon identified as This computer.


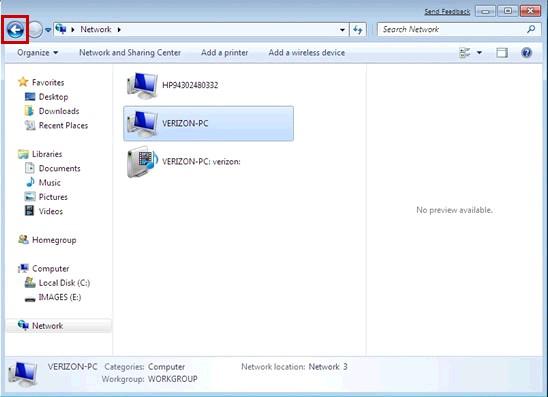
A separate window is opened showing some detailed information about the computer you are on including hard drive storage status, a list of removable storage devices, a folder list at left, and workgroup information with computer specifications at the bottom.

To return to the Network & Sharing home page, click the 
Back button.


Now click on the Network icon on the graphical map.


This opens the Network page in the window. The objects in this window are discussed in detail in the Network walk through.

To return to the Network & Sharing home page, click the 
Back button.


Now click on the Internet icon in the graphical image.


This opens the Internet Explorer browser and defaults to your home page.

Close the browser and return to the Network & Sharing window.


To go into the Sharing and Discovery options introduced in Windows 7, click the link for Change advanced sharing settings in the left pane on the Network and Sharing home page.


The Advanced sharing settings page opens.

Here is an example of how to set the network up to share a printer. You can turn on or off any of the functions listed here.

Here is an example of how to set the network up to share a printer.

Make sure 
Network Discovery is on.

Turn on 
File and Printer Sharing.

Click the 
Next link in the walk through to continue with the steps.


Scroll down the page to Password protected sharing and make sure it is turned Off.

Click 
Save changes at the bottom of the screen. The printer is now ready to be shared.


If the computer is connected to a network and no further networks are found, Windows will state this. If the computer is not connected to a network and networks are available, Windows will allow you to try and connect to a network on the list.

Click on 
Set up a connection or network.


This is the appropriate screen to set up either a PPPoE shim or a dial up account. For this example we will create a PPPoE shim.

Select 
Connect to the Internet, then click Next.


Windows 7 will ask you how you want to connect.

Click 
Broadband PPPoE.


Enter the information given by your Internet service provider (ISP) and give the connection a name.

Mark the checkbox for 
Remember this password and if you want all users of this computer to use this connection, be sure that Allow other people to use this connection is also checked.

Click 
Connect.


Please wait while Windows creates the connection and authenticates it for usage.


Once Windows 7 has confirmed the settings you will receive a confirmation of The connection to the Internet is ready to use.

Click 
Close to return to the Network & Sharing page.


This concludes the Windows 7 - Network & Sharing walk through.